Azure has recently introduced the Managed Disks migration functionality that allows users to migrate from unmanaged Disks to Managed Disks in the Azure Portal in a single click.
Here is an overview of the benefits for those using Managed Disks:
A complete list of the benefits is available here.
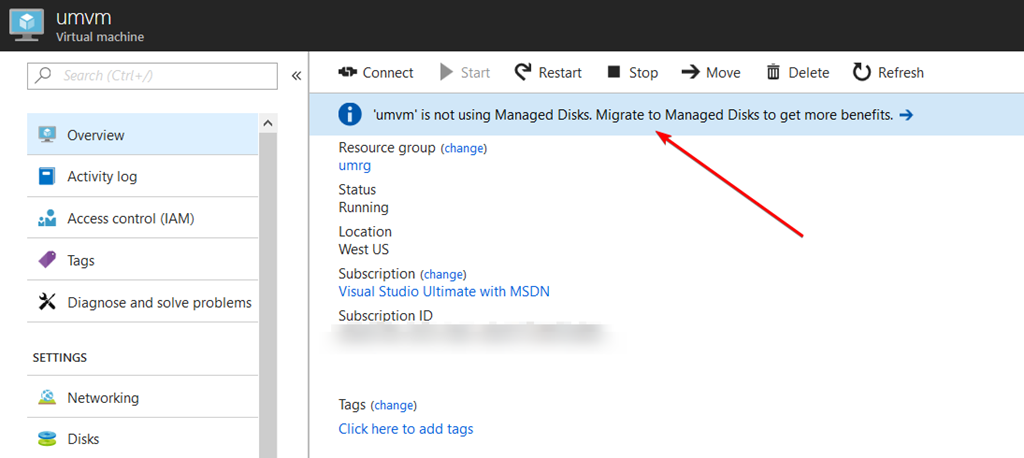
Click on the info banner on the VM overview pane
Click on Migrate in the migration modal dialog

If your VM is in an Availability Set, the Availability Set has to be migrated first.
[su_note note_color=”#eeeeee” text_color=”#151212″]Pro Tip: protect VMs with managed disks with Azure Site Recovery.[/su_note]
Migration progress will be displayed in the migration modal as indicated below

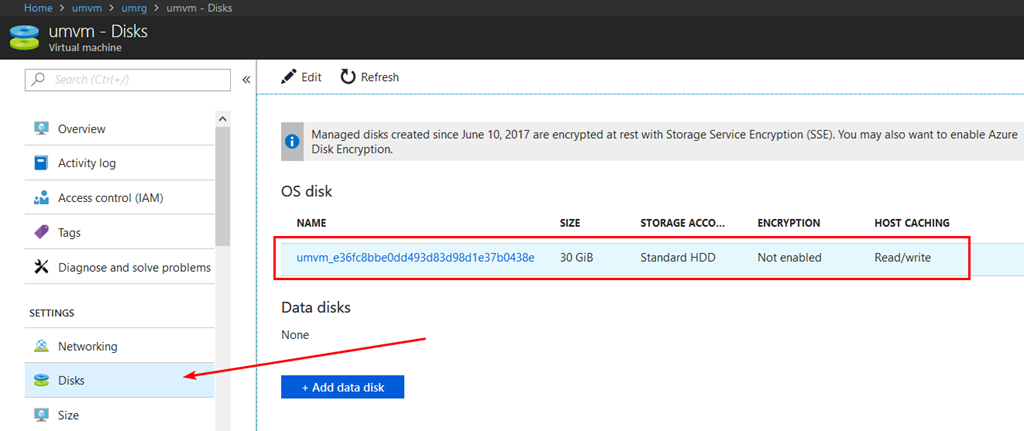
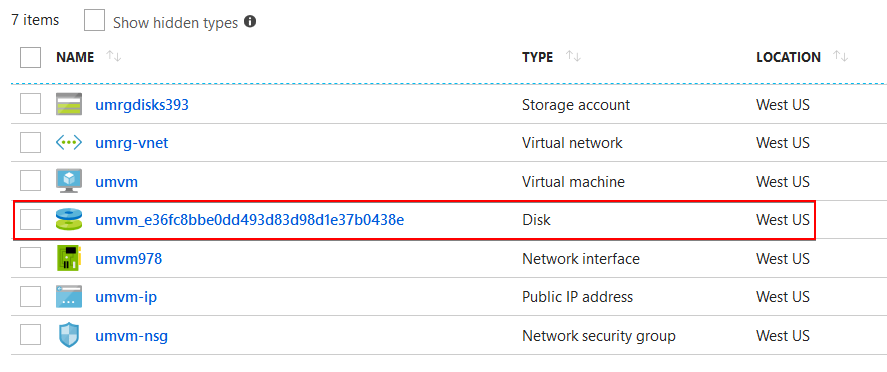
An additional disk resource will now be available in the Resource Group view. You’ll see one disk for every OS & Data Disks that were attached to the VM.
Additional details about the disks of the VM are available on the Disks item in the sidebar